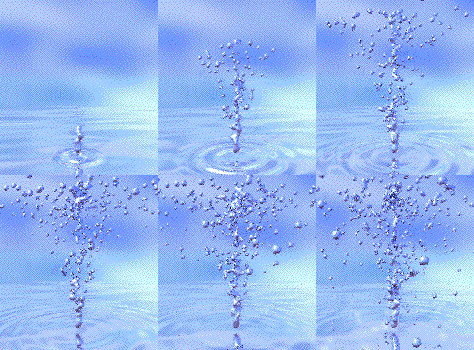
|

Set up your Maya options for animation
Use Windows->Settings/Preferences->Preferences
Choose the Time Slider section
Set Framerate: 30 fps
Set Playback start/end between 1 and 300.
Set Animation start/end between 1 and 300.
Set Playback speed: Play every frame
Click Save

Make sure the maximum playback on the time slider to 300, over to the right on the time slider.
Emitter
Switch over to the FX section, choose from upper left, status line.

Choose nParticles->Create Emitter
In the Channel Box, Set Translate Y to 2 for the emitter.
Hit the Play Arrow on the Time Slider, you should see omni-directional particles. 
Rewind to the beginning of the Time Slider, Select the emitter.
Use the Channel Box to change: (These can also be done in the Attribute Editor.)
Each time you make a change hit the play arrow and note the difference.
Emitter Type Directional
Rate 300 (Number of particles per second emitted.)
Direction X 0
Direction Y 1
Direction Z 0
Spread .2
Speed 7
Add Shading Attributes to the Particles
Open Windows->Attribute Editor for the selected particles. (Shortcut Control a)
Under nParticleShape1 tab
Under Particle Size
Radius .3
Under Shading
Select Particle Render Type: Blobby Surface (s/w)
(Renders with software renderer only.)
Input Threshold .3 (Coagulation like metaballs)
Add a Collision Surface
Create a Poly plane and scale it up a bit.
Select nCloth->Create Passive Collider
Play the animation.
Experiment by adjusting Poly Plane rotation or adding other Passive Colliders.
nCloth can collide with nParticles
StandardSurface Shader
nCloth particles work with Maya Shaders, Maya Render, Arnold Renderer and Arnold shaders.
 Hypershade Hypershade
Under Create
Select Maya and Surface
Click on the Standard Surface icon
Select the particles
Hold right mouse over the StandardSurface material
Click Assign Material to Selection
In the Attribute Editor
Change the Shader to Type Ai Standard Surface
Press the Presets* button select a liquid preset you would like to try.
Change the Shader back to Type Standard Surface (This will give you an icon)
Add Lights
Arnold->Lights->Skydome Light
In the Attribute Editor
Change the Intensity value to .3
Uncheck Cast Shadows
Uncheck Cast Volumetric Shadow
Change the Camera value to 0 (This turns off the background color.)
Arnold->Lights->Area Light
In the Channel Box
Translate X -10, Y 15 and Z 10
Rotate X -45, Y -45
Scale X .2, Y .2, Z .2 TThis will give you sharper shadows.)
In the Attribute Editor
Change Exposure to 10
Under the Shadows section change Shadow Color to a dark gray
Render Settings
Render Settings icon upper right  (Windows->Rendering Editors->Render Settings...) (Windows->Rendering Editors->Render Settings...)
Change Render Using to Arnold Renderer (Arnold is the default)
Presets-> Import Render Settings->Default Settings (This resets all settings)
Under the Common tab:
Choose Image format: tif
Uncheck Dither
Change Frame/Animation ext: to name.#..ext
Input the Start frame and End frame range
Faster settings, with transparency
Under the Arnold Renderer tab:
Under the Sampling arrow:
Set Camera (AA) to 3 (default 3)
Set Diffuse to 1 (default 2)
Set Specular to 1 (default 2)
Set Transmission to 2 (default 2)
Set SSS to 0 (default 2)
Set Volume Indirect to 0 (default 2)
Under the Ray Depth arrow
Set Total to 2 (default 10)
Set Diffuse to 1 (default 1)
Set Specular to 1 (default 1)
Set Transmisssion to 2 (default 8)
Set Volume to 0 (default 0)
Set Transparency Depth to 2 (default 10)
Render an image to the Render View
Click the Render View icon upper right  to open the window to open the window
Click the Start IPR icon 
Save a Geometry Cache of your ncloth and particles
You will need to do this for the schools Deadline render farm.
Select your nParticle1 and any nCloths if you have any
Select nCache->Create New nCache->nObject->
Select the folder icon 
Make a new folder named cache, or something descriptive
I prefer to save this folder to my scenes folder
Check the cache by changing the time on the Timeline, you will see your animation update.
If you use the Deadline Render Farm, you will need to put all the cache files in the Cloud Remote scenes directory at the same level as the scenes file and the texture files. (No sub-directories.)
Save your file.
See Deadline course notes
Convert nParticles to Poly
Modify->Convert->nParticle to Poly (You might not like the result.)

|