|
Prebuilt SteamVR Project with Universal Rendering Pipeline
Download this 2021 scene, move the folder to your Desktop or working area.
This file is already setup with SteamVR and some other tools. SteamVR runs the VR headsets on PCs.
https://classes.dma.ucla.edu/Fall22/156/projects/URPtemplate.zip
PC: Right mouse over folder select Extract All...
Rename the template folder. Place it in a new location.
Start the Unity Hub
Select ADD
Locate your renamed project folder
Click on the project to start
Mac Only:
Mac error: Answer SwitchTarget
Add Some Primitives
The nice thing about primitives, the collision boundaries are already set up.
Choose GameObject->3D Object->Sphere etc.

Hand moves the view, Move Tool, Rotate, Scale, Rectangle Select and the Move Rotate Scale Tool.
Add more primitive shapes, place them above the floor.
Add Some Materials
Select Assets->Create->Material.
Double click the material in Assets below.
Change the Albedo color in the Inspector on the right.
Drag and drop the material onto the primitive while in Scene Mode
Scene View Camera
Use the Alt key left mouse to tumble the camera. Alt right mouse to zoom.
Click an axis such as X in with the XYZ axis to look down the X axis.
You can toggle between Persp, Iso and 2D by clicking on the word below the axis.

F for Frame
Select an object, hit f
The camera will adjust the clipping planes and zoom in on the object.
You may notice some objects gradually disappearing, use f to adjust this.
:::::::::::::::::::::::::::::::::::::::::::::::::::::::::::::::::::::::::::::::::::::::::::::::::::::::::::::::::::
Unity on Mac computers does not recognize OpenVR (SteamVR)
Select Window->Package Manager
Packages: In Project
Select OpenVR XR plugin and Remove
Try your Project in Simuator mode if you do not have a headset
Hit the Play button to stop and start your game. 
If you are running in Simulator mode use w a s d, q r or the arrow buttons to navigate around the scene, and the right mouse to rotate the camera. Left mouse for interactions.
In the Hierarchy, you can move the Player up off the ground and position it anywhere you prefer.
(For VR later, we will need this to start at 0,0,0)
:::::::::::::::::::::::::::::::::::::::::::::::::::::::::::::::::::::::::::::::::::::::::::::::::::::::::::::::::::
Throwable Objects
The throwable tool is made by Valve for SteamVR.
Create a cube, GameObject->3D Object->Cube
Select the cube
Use Add Component button located in the Inspector at the bottom.
search for throw select Throwable
Under Interactable Script in the Inspector
Turn off Highlight on Hover
Hit Play and throw your object, view this in the Game tab.
(This tool adds 3 scripts, RigidBody, Throwable and Interactable. Your object needs a collider for this to work.)
Add Velocity
Select the cube, use Add Component
search for vel select VelocityEstimator
Hit Play
:::::::::::::::::::::::::::::::::::::::::::::::::::::::::::::::::::::::::::::::::::::::::::::::::::::::::::::::::
Add a Physics Material to make the objects bouncy
Select the Assets->Create->Physic Material from the menu.
Give the material a name.
Select the Physic Material
Change Bounciness to .4 in the Inspector
Select the object you would like to adjust the bounciness:
In the Inspector tab, under Collider, assign the Material

Hit Play, try adjusting the bounciness.
:::::::::::::::::::::::::::::::::::::::::::::::::::::::::::::::::::::::::::::::::::::::::::::::::::::::::::::::::::
Import a new Skybox
Select Window->Asset Store
Click Search online
A browser pops up, sign in to your Unity account
Type skybox in the search bar
Select Free Assets (under Pricing)
Select Add to My Assets
Go to My Assets
Select Open in Unity
The Package Manager will open
Find the skybox you selected
Select Download
Select Import twice
Select the Scene tab
Choose Window->Rendering->Lighting Environment tab
Click the  to change the Skybox Material to the skybox you imported. to change the Skybox Material to the skybox you imported.
The list can be daunting, you might verify the name of the material in your Assets folder.
You can also make your own skybox from scratch.
:::::::::::::::::::::::::::::::::::::::::::::::::::::::::::::::::::::::::::::::::::::::::::::::::::::::::::::::::::
Publish to WebGL
You may view your project in a browser on a computer or a phone.
:::::::::::::::::::::::::::::::::::::::::::::::::::::::::::::::::::::::::::::::::::::::::::::::::::::::::::::::::::
EXAMPLE

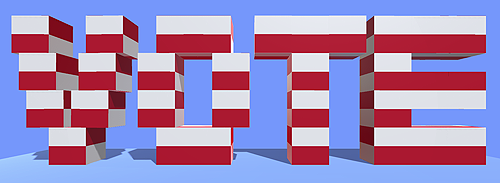
https://classes.dma.ucla.edu/Winter21/156/projects/examples/A_vote_primitives_player
:::::::::::::::::::::::::::::::::::::::::::::::::::::::::::::::::::::::::::::::::::::::::::::::::::::::::::::::::::
How to transfer Your Project Between Mac and PC
Move the entire project over to the PC or Mac, keep a backup
Open Unity Hub
Under Projects
Select ADD
Select your folder
Start the project from the list of Projects
If it asks you to SwitchTarget upgrade or downgrade you must answer CONFIRM
(If the versions are close enough it should work.)
:::::::::::::::::::::::::::::::::::::::::::::::::::::::::::::::::::::::::::::::::::::::::::::::::::::::::::::::::::
OBS
OBS screen capture VR documentation
:::::::::::::::::::::::::::::::::::::::::::::::::::::::::::::::::::::::::::::::::::::::::::::::::::::::::::::::::::
Later install OpenVR XR Plugin to run a VR Headset
This plugin interferes with WebGL publish.
Select File->Build Settings...
Select PC, Mac & Linux Standalone
Select Switch Platform
Download: OpenVR
Click Latest button to download: com.valvesoftware.unity.openvr-1.1.4.tgz tarball file
XR Plug-in called OpenVR Loader or OpenVR XR Plugin.
Under the +, upper left
Select Add package from tarball...
Locate the com.valvesoftware.unity.openvr-1.1.4.tgz tarball file in your downloads folder
Fix Bindings, if there is an error message
Delete the Assets/SteamVR_Input folder in your project.

|