|

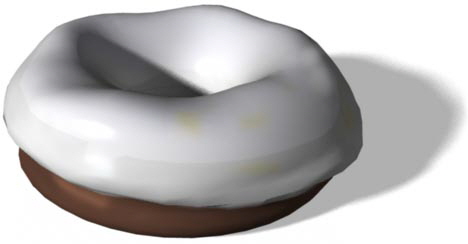
Change a torus into a fresh baked frosted chocolate donut.
Select the Modeling section of Maya, choose from upper left.

Choose Create->Polygon Primitives->Torus->
Input Subdivisions Axis 40
Input Subdivisions Height 40
Poly Sculpting Tool
Mesh Tools->Sculpting Tool ->Sculpt Tool->
(These tools only work on polygons.)
Input Size: 0.2
Input Strength: 0.1
Hold left mouse key and drag over the Torus to sculpt.
Check Invert under the Sculpt tool to push the points.
To easily access the sculpting tools, Click on the Sculpting tab on the shelf.
To open up sculpting tool settings, double click a Sculpting Tool on the Sculpting shelf.
Experiment with other sculpting tools.
Textures as Brushes
To sculpt with image textures:
In Tool Settings, under Stamp, check Use Stamp.
Click on Pick Stamp or Import next to the blank texture square.
On mac, go to:
/Applications/Autodesk/maya2020/Maya.app/Contents/Examples/Modeling/Sculpting_Stamps
On PC, go to:
C:\Program Files\Autodesk\Maya2020\Examples\Modeling\Sculpting_Stamps
Select any .tif texture. Hit Open
Click on Pick Stamp next to the texture, you should see all the other stamps available to use in the Content Browser.
Now when you use the sculpt tool, it should be textured.
You can also use Stamp with other Sculpting tools to add textures to your model.
:::::::::::::::::::::::::::::::::::::::::::::::::::::::::::::::::::::::::::::::::::::::::::::::::::::::::::::::::
Sculpt Geometry Tool NURBS or POLY
Go to the Modeling Section, this is similar to the Sculpting tools, but also works on NURBS.
Surfaces->Sculpt Geometry Tool->
Displacement Maps with the Sculpt Geometry Tool
Add a shape with a lot of extra geometry (CVs or vertices).
Choose Surfaces->Sculpt Geometry Tool->
This works with Poly or NURBS
Choose the Attribute Maps section
Under Import, Click the Import... button
Choose an image
Look at your geometry, the image distorted it.
Go back to the first Sculpt tab, notice your shape was distorted by the max displacement and push or pull.
Try painting a distortion with one of the brushes, you may need to change the radius.
:::::::::::::::::::::::::::::::::::::::::::::::::::::::::::::::::::::::::::::::::::::::::::::::::::::::::::::::::
3D Paint a Texture Map Poly or NURBS
Image Texture Map
Select the Torus Donut.
Use the right mouse key over donut to bring up the marking menu, select Assign Favorite Material->Lambert or Phong
Under the Attribute Editor, on the right side of the screen  (Or Ctrl a) (Or Ctrl a)
Find the new Shader tab.
Click the Map Button across from Color 
Select the File icon 
Change Filter Type to Off (less blurry, default Quadratic)
Under Arnold Change Filter Type to closest (default smart_bicubic, less blurry)
File->Save your scene into your Unity Assets folder
Hit 6 on the keyboard to see the model shaded with texture.
(You do not have a texture yet.)
Select the Rendering section of Maya, choose from upper left.

Select your Poly (or NURBS) model
Use Texturing->3D Paint Tool->
Select Assign/Edit Textures button
Select a resolution such as 1024 x 1024"
Select Image Format: Tiff (tif)
Select Assign/Edit Textures button to exit
Start Painting, select colors, change the size of the brush.
File->Save your scene into your Unity Assets folder
Relocate the Texture map
** The texture will be assigned to a folder in your project. You will need to get this file and place it where you need it, either in your Unity Assets or your Maya Scenes directory.
This is where the file is initially placed:
\maya\projects\default\sourceimages\3dPaintTextures\...
Relocate the map. You may paint it in Photoshop.
 Windows->Rendering Editors->Hypershade Windows->Rendering Editors->Hypershade
Go to the Textures tab
Double click the texturemap to view it in the Attribute Editor
Click the folder icon and locate your relocated texture map 
Change Filter Type to Off (less blurry, default Quadratic)
Under Arnold
Change Filter Type to closest (less blurry, default smart_bicubic)
Hit 6 (shader display) to view the texture shaded on the model.
Make a Shiny Material in Unity
Select Assets->Create->Material.
Try Shader Standard (specular setup)
Change the Specular color
Drag the map from Assets onto the Albedo square in the Inspector.
Drag and drop a material onto your model
Fix the Map for Unity
Select the Map in your Assets/Materials folder
Change the Filter Mode to Point (no filter) (default Bilinear)
Hit Apply

|