|
Find Out Your Ring Size
Use this Ring Size Chart to size your finger for the ring. Save a copy of the PNG to your computer.
Print out the chart 200ppi from Photoshop
Cut out the Ring Size template, measure your finger.
Select the Modeling section of Maya, choose from upper left, status line.

Add the chart to an image plane to match the size
Select Create->Free Image Plane
Use the Attribute Editor (Ctrl a)
Select Image Name folder, add the ring size chart 
Bring down the Color Gain a bit darker
Re-select the image plane
Use the Channel Box (Ctrl a)
Hit the arrow up button to see the transformation options, or reselect the image plane.
Choose the image plane, Rotate X -90 degrees
Choose the image plane, Scale X, Y, Z 1.27, 1.27, 1.27
(In Maya each grid unit = 1 cm)
Input, Relative Transformations

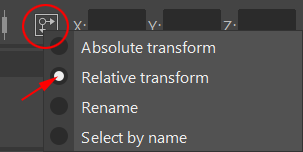
Switch the selection button to Relative transformation in the Input Type box, on the status line, on the top middle right side of the screen. (Sometimes this is hidden if your screen is small, click on the show/hide buttons to expand hidden sections.)
When you enter a value in the box for a transformation, such as scale, rotate, or move, the object or component will transform will move relative to its position.
Make Some Guide Shapes
Diameter and size Curve
Create->Curve Tools->CV Curve Tool->
Select Curve degree: 1 Linear
Use grid snap x and click the first point in the top view at the origin, 0,0,0
Input the second point in the Relative Transform box X: check your ring size, mine is a size 9 so I will input 1.9 cm.

Use Display->NURBS->CVs to show the CVs
Use the curve as a diameter guide.
Minimum print dimensions
Make a .1 cm guide, Shapeways does not let you print metal objects thinner than .1 cm.
Make a .2 cm guide, the height of the ring will need to be .2 cm or more.
Circle
Select Create->NURBS Primitives->Circle->
Normal axis: Y
Radius input half your ring diameter size (my ring size 9: 1.9 cm / 2 = .95 cm)
Number of sections 80
The circle should match the ring size on the chart in the image plane.
Circumference
If you need to know the circumference use, perhaps make a guide for this too.
Pi * diameter (for my size 9: 3.14159 * 1.9 cm = 5.969021
Use any tools to model a ring.
Inspect your model for holes or flipped faces.
Use Mesh->Fill Hole to fill holes
Use Edit Mesh->Merge to clean up your mesh, careful the tolerance does not delete the wrong points.
Bend a Flat object into a Ring
If you start with a flat shape, such as a cube
Use Create->Polygon Primitives->Cube->
Width: .2
Height: .1
Depth: 5.9690 Pi * diameter (for my size 9: 3.14159 * 1.9 cm = 5.969021)
Depth divisions: 80
Axis: Y
Rotate the cube 90 degrees around Y
Select Modify->Freeze transformations
Delete the 2 end faces
Select the Cube
Use Deform->Nonlinear->Bend
Rotate the bend deformer to match the intended bend, 90 degrees around Z
Use the Channel Editor to modify the Curvature of the Bend (180 degrees)
Use Edit Delete by Type->History to delete the Bend deformation
Rotate the ring 90 degrees around X and match it to the diagram. You will need to scale the ring up a bit.
Use Edit Mesh->Merge to remove doubled vertices and seal holes.
Embossing and Engraving
The minimum embossing or engraving is .03 cm wide and high, better to use .04 cm
You may always taper the shape so the form does not form a 90 degree edge.
If your ring is embossed you may want to add a slight bevel to the bottom face of the boolean.
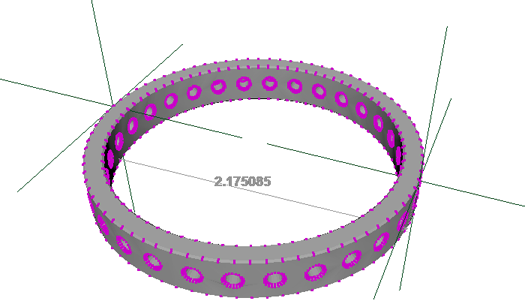
Check the outer diameter of you ring so you can compare it to the Shapeways scale
Select your ring.
Choose Display->Polygon->Vertices
Use Create->Measure Tools->Distance Tool
Use v point snap and shift to constrain to measure from the outer edge of the ring

Prepare your model
Edit->Duplicate, hide original
Edit Mesh->Merge input a very small number, .00001
Mesh->Cleanup-> select Lamina Faces select Lamina Faces
Select all the parts, use Mesh->Combine to make one object
Export your model
File->Save Scene As your scene as a backup, the software can crash exporting.
Select your model.
Choose File->Export Selection...
File type: DAE_FBX export .dae extension
Name your file Your name_Xsize_mm_material_ring_size.dae
The outer X dimension will be between 20-30mm, 2-3cm
Place this file in the drop/assignment_2_ring_models_DAE_FBX_OBJ folder on the class server
file.dma.ucla.edu port 22 /data/classes/Fall22/156/drop
Uploading to Shapeways to test
The class has a minigrant, you do not need to pay. You will upload your model to the drop folder and I will print your model. This next procedure is a test to make sure it all works.
Go to www.shapeways.com and select upload
Make an account, make sure you apply for the 15% student discount for future prints.
Select the Smiley Face menu, choose Upload your DAE file or OBJ, choose your material.
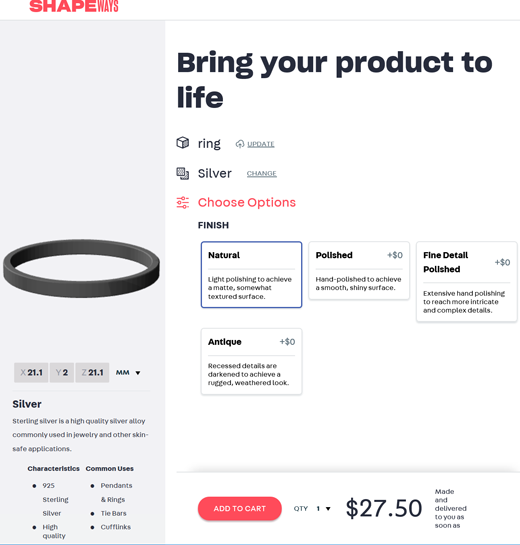
If the MM size does not match your measured size, select RESIZE
Shapeways offers a preview where you should inspect your model again.
Check the scale and look for missing/flipped faces.

You are ready to print!

|
